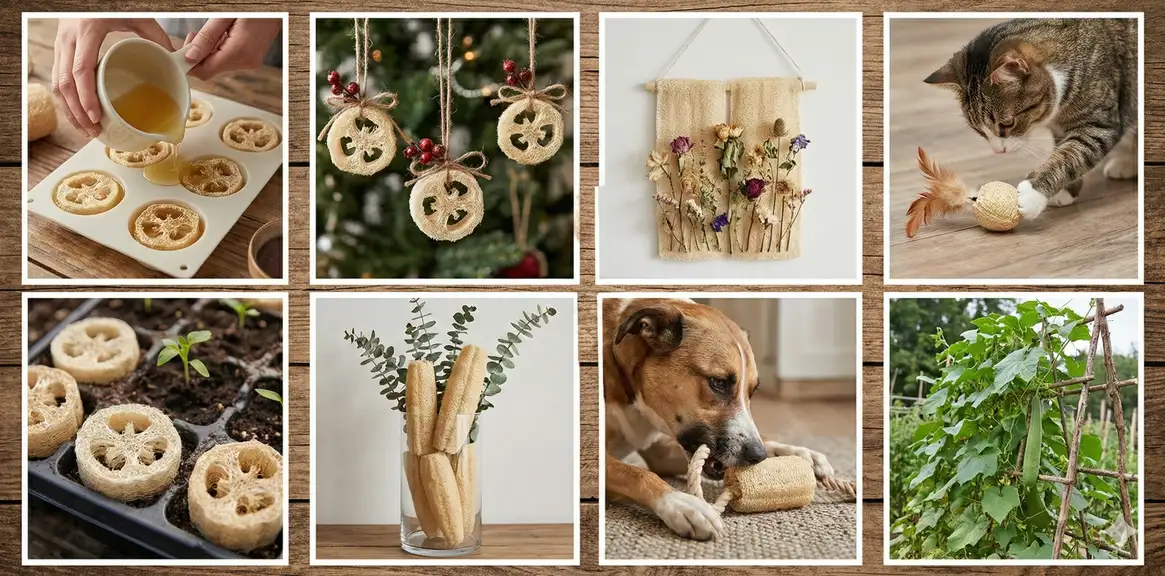
Natural loofah sponges aren't just for bathing anymore. These versatile, sustainable materials offer endless creative possibilities for DIY enthusiasts, from luxurious handmade bath products to unique home decor items. Whether you've grown your own loofahs or purchased them from a craft store, this comprehensive guide will inspire you with dozens of project ideas and teach you the essential techniques for working with this remarkable natural material.
Crafting with loofahs combines creativity with sustainability. Unlike synthetic materials, loofahs are 100% biodegradable, renewable, and offer a unique texture that adds natural beauty to any project. From practical items like embedded loofah soap to decorative loofah pieces, you'll discover why loofah crafting has become increasingly popular among eco-conscious makers. If you're growing your own, check out our guide on how to prepare loofah for crafting to get your sponges ready.
Why Craft with Loofah Sponges?
Loofah sponges offer unique advantages that make them ideal for creative projects. The natural beige color provides a neutral base that works with any decor style, from rustic farmhouse to modern minimalist. You can also dye loofahs using natural or fabric dyes to create colorful variations for seasonal projects or to match specific color schemes.
Loofah crafts offer significant environmental advantages over synthetic alternatives. The material is 100% natural, biodegradable, and compostable, meaning your finished projects won't contribute to plastic pollution. You can grow your own craft supplies in your garden, making loofahs a truly renewable resource with minimal processing required. When your projects eventually wear out, they can be composted to enrich garden soil rather than filling landfills.
The natural fibrous structure of loofah creates visual interest and tactile appeal in finished projects that synthetic materials simply cannot replicate. Loofah is remarkably easy to work with, cutting, shaping, dyeing, and bonding easily with basic tools and supplies. This versatility makes it suitable for bath products, home decor, garden projects, and kids' crafts. The built-in exfoliating properties make loofah especially valuable for bath and beauty products.
Essential Tools and Supplies
Before diving into specific projects, gather these basic supplies. Most items are affordable and available at craft stores or online. Having everything prepared makes the crafting process smooth and enjoyable.
Recommended Craft Supplies
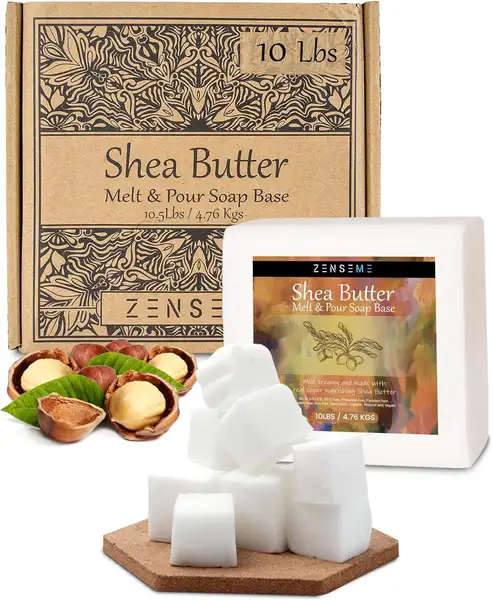
Premium Shea Butter Soap Base (10 lbs)
Premium melt-and-pour soap base enriched with shea butter for extra moisturizing properties. Perfect for embedding loofah slices in luxurious, skin-nourishing bars.
Check Price on Amazon
PURA D'OR Organic Essential Oils Set (16 Scents)
Complete aromatherapy set with 16 USDA organic essential oils including lavender, eucalyptus, and tea tree. Perfect for scenting loofah soap and bath bombs.
Check Price on AmazonAs an Amazon Associate, we earn from qualifying purchases.
Additional Supplies Checklist
- Sharp scissors or serrated knife: For cutting through fibrous loofah cleanly
- Natural twine or jute cord: For wrapping, hanging, and decorative elements
- Hot glue gun & sticks: Essential for quick, strong bonds on loofah projects
- Fabric dyes: For coloring loofahs in custom shades
- Dried flowers and herbs: Lavender, rose petals, chamomile for decorative accents
- Ribbon and fabric scraps: For wrapping and embellishments
Basic Loofah Crafting Techniques
Master these fundamental techniques to execute any loofah project successfully. These skills form the foundation for all the creative ideas we'll explore.
- Cutting: Use sharp scissors or a serrated knife to cut dry loofah. For cleaner cuts, lightly dampen the loofah first, then let it dry completely before use.
- Slicing rounds: Cut perpendicular to the length for circular discs (1/4" to 1" thick). Perfect for soap-making and coasters.
- Shaping: Soak loofah in warm water for 5-10 minutes to make it pliable, then mold into desired shape and let dry completely (24-48 hours).
- Dyeing: Submerge in hot dye bath (140-160°F) for 15-30 minutes. Natural loofahs absorb dye well. Rinse until water runs clear and air dry.
- Gluing: Hot glue works best for quick bonds. E6000 or craft glue provides stronger, more flexible adhesion for stress points.
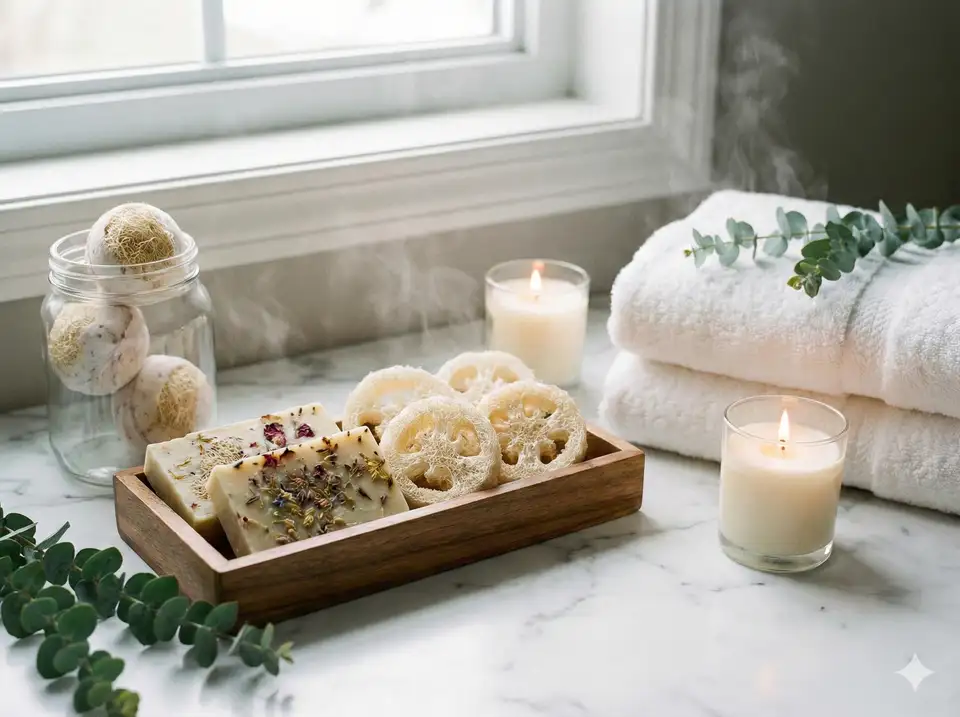
Bath & Beauty Craft Projects
These luxurious handmade bath products combine loofah's natural exfoliating properties with nourishing ingredients for spa-quality items you can make at home. They're perfect for personal use or as thoughtful gifts.
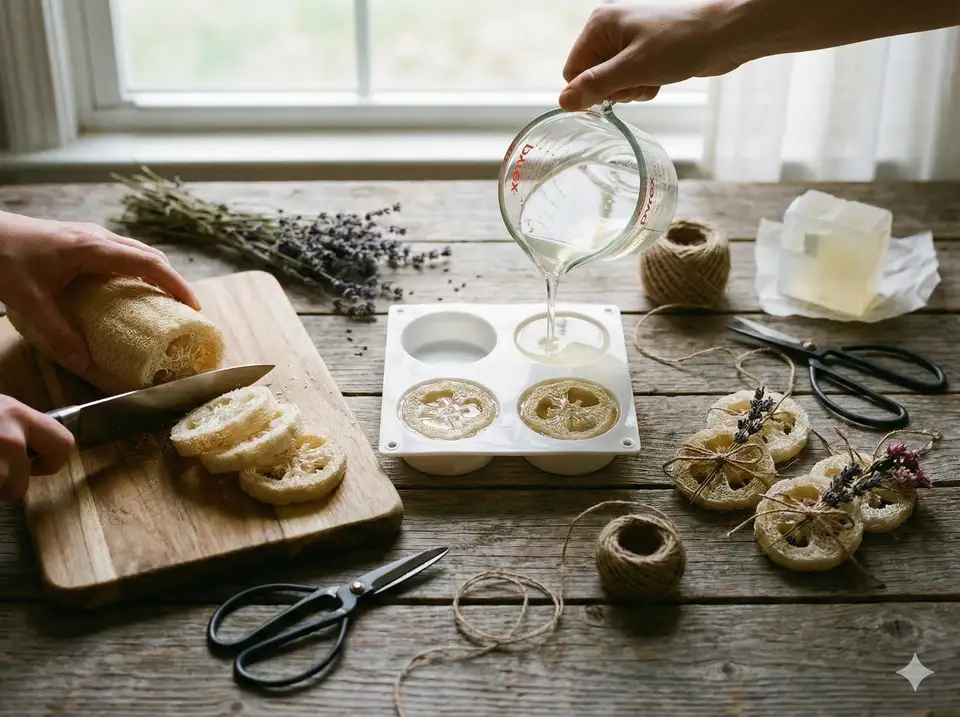
Materials: Loofah rounds (1" thick), melt & pour soap base, essential oils, soap molds
- Cut loofah into 1-inch thick rounds and place in soap molds
- Melt soap base in microwave (30-second intervals, stirring between)
- Add 10-15 drops essential oil per cup of melted soap, stir well
- Pour melted soap over loofah rounds, ensuring complete coverage
- Tap mold gently to release air bubbles
- Let cool 2-3 hours until completely hardened
- Remove from molds and let cure 24 hours before packaging
Pro tip: Layer different colored soaps for a beautiful striped effect, or embed dried lavender buds between layers.
For more detailed instructions on making embedded loofah soap, check out our dedicated soap-making guide. You can also create loofah bath bombs by embedding small loofah pieces into fizzing bath bomb mixtures.
Materials: Loofah sponge, cotton washcloth, elastic, needle & thread
- Flatten and measure your loofah to fit palm size (approximately 4x6 inches)
- Cut cotton fabric to mitt shape, adding 1/2" seam allowance
- Stitch loofah securely to fabric palm using strong thread
- Sew mitt pieces together inside-out, leaving wrist open
- Add elastic to wrist opening for secure fit
- Turn right-side out and trim any loose fibers
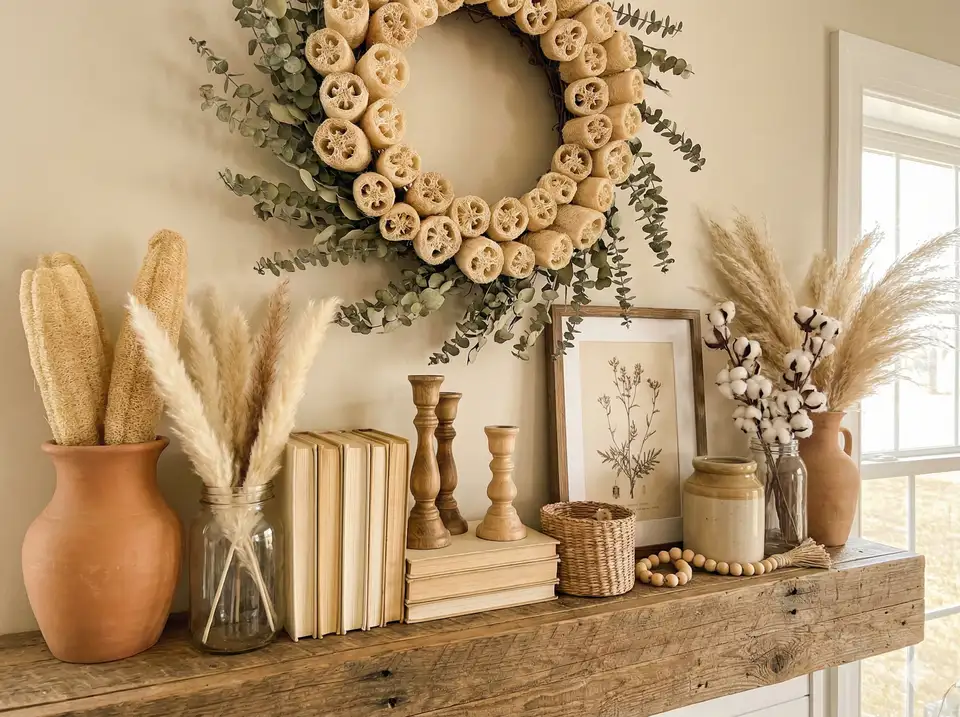
Home Decor Craft Projects
Loofah's natural texture makes it perfect for rustic and eco-friendly home decor. These projects showcase the beauty of sustainable materials while adding unique character to any space. Consider creating decorative loofah pieces for every room in your home.
Materials: 12-15 small loofahs, wire wreath frame (12-14"), floral wire, natural accents (pinecones, dried flowers), ribbon
- Wrap wreath frame with burlap ribbon or natural twine as a base
- Attach loofahs to frame using floral wire, spacing evenly around circle
- Vary loofah sizes and angles for visual interest
- Fill gaps with dried florals, pinecones, or seasonal accents
- Add a hanging loop at top using jute or ribbon
Seasonal variations: For holiday decorations, add evergreen sprigs and berries for winter holidays, or autumn leaves and mini pumpkins for fall.
Materials: Canvas or wood backing, loofah slices, hot glue gun, acrylic paint (optional)
- Paint canvas background in desired color (earth tones work beautifully)
- Cut loofah into various sizes: rounds, strips, and irregular shapes
- Arrange pieces on canvas in a pleasing pattern before gluing
- Hot glue each piece securely, working from center outward
- Vary heights by stacking pieces for dimensional effect
- Optional: Highlight raised areas with metallic paint or gold leaf
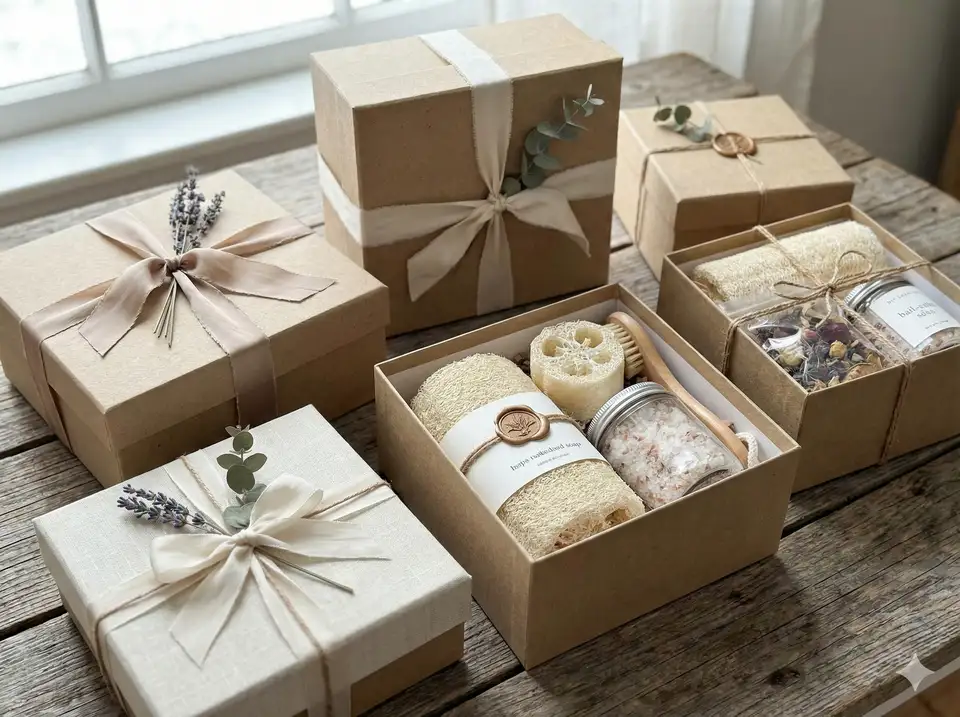
Handmade Gift Projects
These thoughtful DIY gifts showcase the beauty and practicality of loofah crafts. Perfect for holidays, birthdays, housewarmings, or any occasion where you want to give something unique and eco-friendly. If you enjoy creating these, you might even be able to turn projects into income.
Materials: Loofah soap bars, bath sachets, small loofah scrubber, basket, tissue paper, ribbon
- Create 2-3 loofah soap bars in complementary scents
- Make 1-2 matching bath sachets with dried herbs
- Include a small loofah scrubber or bath mitt
- Arrange items in a natural basket or decorative box
- Line with tissue paper and add shredded paper filler
- Create a custom tag listing ingredients and scents
For more gift presentation ideas, see our guide on assembling gift baskets.
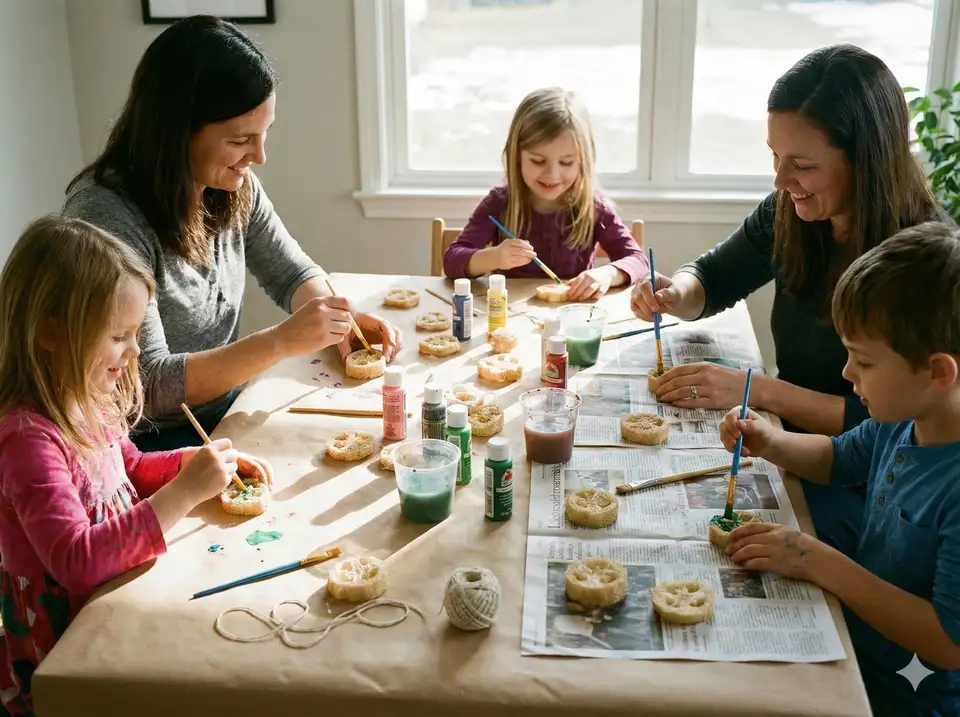
Kids' Craft Projects
These fun, educational projects teach children about natural materials, sustainability, and creativity. Most are simple enough for kids to complete with minimal adult supervision, making them perfect for rainy day activities or educational units on plants and gardening.
Materials: Loofah slices, washable paint, paper or fabric
- Cut loofah into various sizes and shapes (adult task)
- Pour different colored paints into shallow trays
- Let kids press loofah into paint, then stamp onto paper
- Create patterns, pictures, or abstract designs
- Try stamping on fabric to make custom t-shirts or bags
Learning opportunity: Discuss how loofahs grow from seeds into plants, teaching kids about natural materials.
Materials: Small loofahs, googly eyes, pipe cleaners, felt scraps, markers
- Choose animal to create (fish, hedgehog, caterpillar, monster)
- Glue on googly eyes in desired positions
- Add pipe cleaner legs, antennae, or whiskers
- Cut felt pieces for fins, ears, wings, or other features
- Use markers to add details like stripes or spots
Frequently Asked Questions
You can purchase natural loofahs from craft stores, health food stores, online retailers like Amazon, or specialty bath supply shops. Look for unbleached, natural loofahs without synthetic treatments for best crafting results. For the most sustainable option, consider growing your own. A single loofah vine can produce 10-20 sponges, giving you plenty of free craft materials year after year.
Yes, loofahs dye beautifully with both natural and commercial fabric dyes. For best results, use hot water dye baths (140-160°F) and soak loofahs for 15-30 minutes until desired color is achieved. Natural dyes from beets, turmeric, blueberries, and other plant materials create lovely earth tones. Commercial fabric dyes provide more vibrant, consistent colors. Always add vinegar or salt as a mordant to help set the dye.
Use sharp scissors or a serrated bread knife for best results. For cleaner cuts with less fraying, lightly dampen the loofah with water first, which compresses the fibers and reduces shedding. Make confident, decisive cuts rather than sawing back and forth. For very thick loofahs, mark your cutting line with a marker first. After cutting, trim any loose fibers with scissors.
Longevity depends on the project type and use. Bath products like loofah soaps last 3-6 weeks with regular use. Dry decorative items can last years when kept away from moisture and humidity. Loofah scrubbers used in the kitchen should be replaced every 3-4 weeks for hygiene. To extend lifespan of decorative items, spray with clear acrylic sealant and keep in low-humidity areas.
- Start simple: Begin with easy projects like soap bars or sachets before tackling complex items
- Buy in bulk: Purchase loofahs in larger quantities for better value
- Save scraps: Even small loofah pieces work for kids' crafts, pet toys, or garden mulch
- Consider growing: If you enjoy loofah crafting, grow your own craft supplies for unlimited free materials
- Package beautifully: Use natural materials like burlap, twine, and kraft paper to complement loofah's organic aesthetic
Crafting with natural loofah sponges offers endless creative possibilities while supporting sustainable, eco-friendly living. Whether you're making luxurious bath products for yourself, creating unique home decor, assembling thoughtful gifts, or teaching children about natural materials, loofah crafts combine beauty, functionality, and environmental consciousness. Remember that every loofah craft you make replaces a synthetic alternative, contributing to a healthier planet while creating something beautiful and useful.