Watching your planted loofah seeds sit in soil with no sign of life is frustrating. You've done everything right—or so you thought—but days turn into weeks with no sprouts. Don't give up yet. Loofah germination failure is almost always fixable once you identify the cause.
This guide covers the 7 most common reasons loofah seeds fail to germinate and exactly how to fix each one. Whether you're troubleshooting current seeds or preventing problems with your next batch, you'll find actionable solutions here.
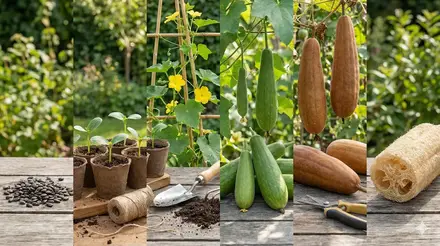
Germination Success Essentials
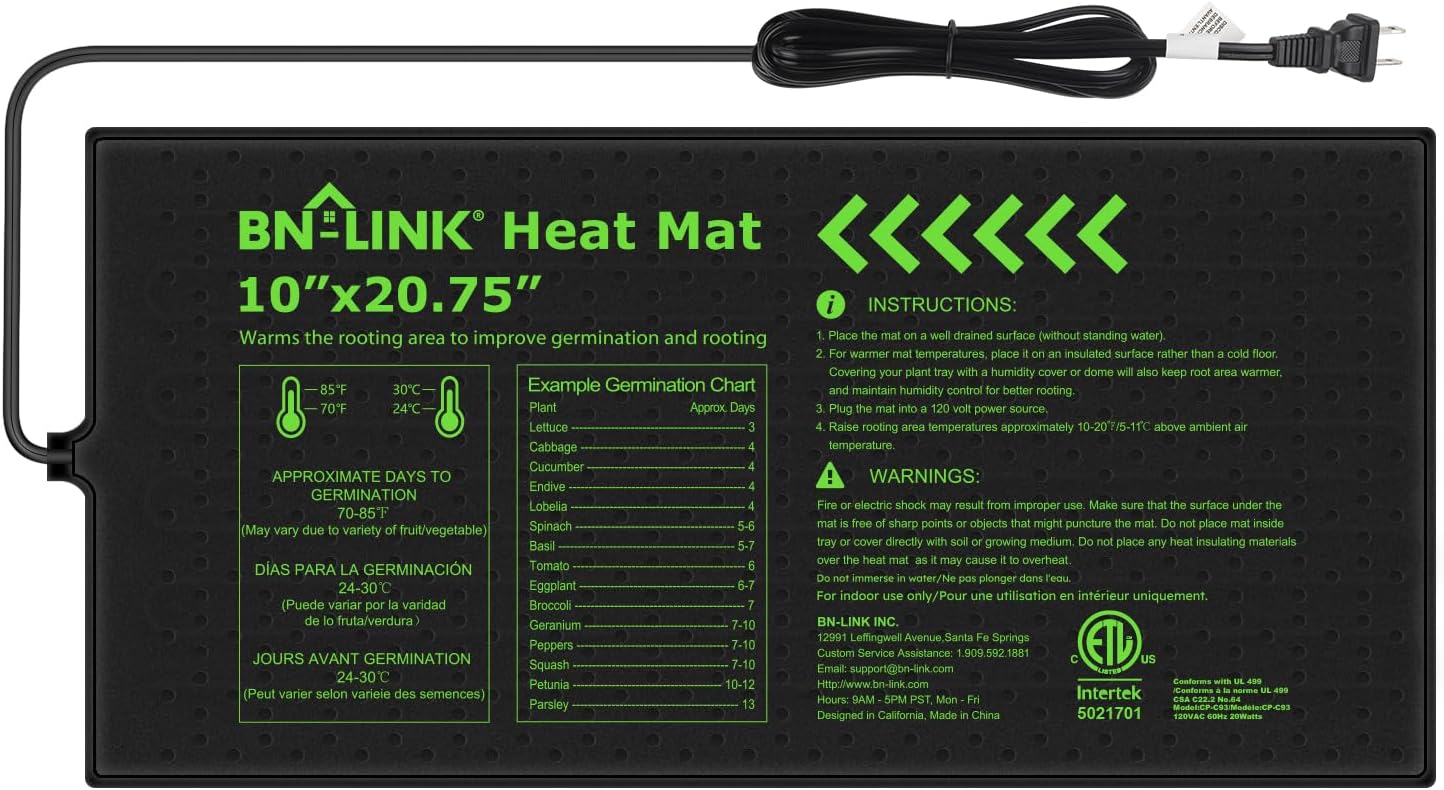
BN-LINK Seedling Heat Mat for Faster Germination
Cuts loofah germination time in half - waterproof design maintains optimal 75-85°F soil temperature
Check Price on Amazon
GooingTop Full Spectrum LED Grow Light with Timer
Start loofah seeds indoors months early - adjustable height and automatic timer for hands-free growing
Check Price on AmazonAs an Amazon Associate, we earn from qualifying purchases.
1. Soil Temperature Too Cold
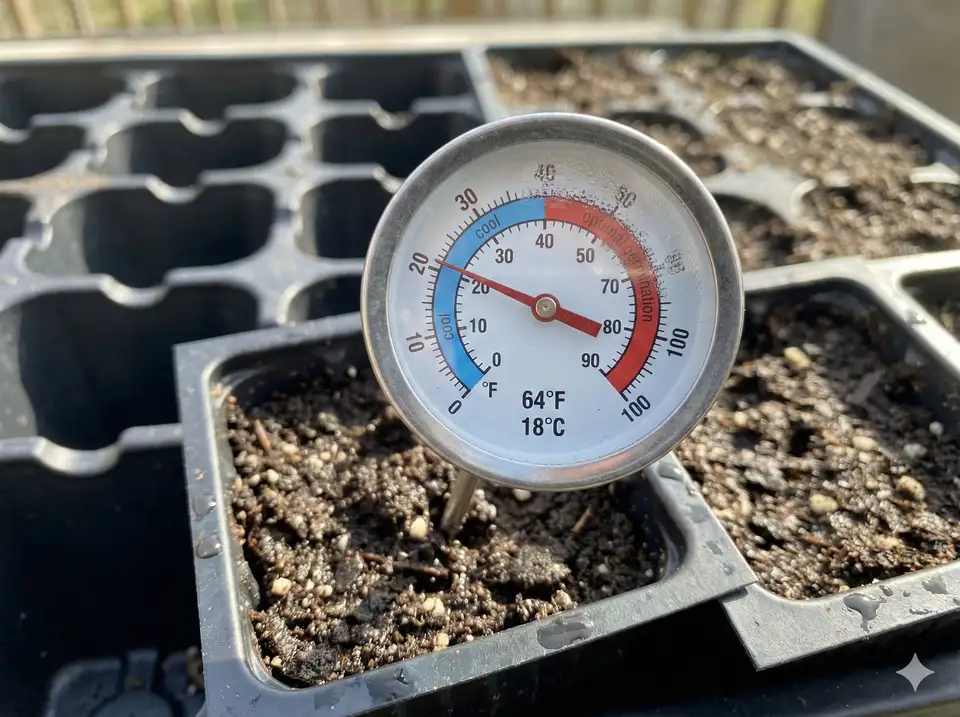
This is the #1 cause of loofah germination failure. Loofah is a tropical plant that requires warm soil to germinate. Seeds planted in soil below 65°F will either rot or remain dormant indefinitely. Room temperature (68-72°F air) often means soil is only 60-65°F—too cold for loofah.
How to know this is your issue: You planted seeds more than 2 weeks ago, soil feels cool to the touch, you're starting seeds in an unheated space, or it's early spring with cool nights.
Use a seedling heat mat. Set it to 75-80°F and place pots directly on it. Verify actual soil temperature with a probe thermometer—don't trust air temperature. If no heat mat is available, place pots on top of your refrigerator or near (not on) a heating vent.
Investing in a heat mat is the single best thing you can do to improve germination rates, especially for gardeners starting seeds indoors in early spring.
2. Old or Improperly Stored Seeds
Loofah seeds have a limited viability window. Seeds older than 2-3 years, or seeds exposed to heat, humidity, or light during storage, may have died before you planted them. Even "fresh" seeds from questionable sources may have been stored improperly.
How to know this is your issue: Seeds are from an unknown source, packet has no date, seeds were stored in a garage/shed, seeds look shriveled or discolored, or you saved seeds improperly from last year.
Test seed viability before planting. Place 10 seeds on a damp paper towel, fold, seal in a plastic bag, and keep warm (75-80°F). Check daily for 2 weeks. If fewer than 5 sprout, get fresh seeds from a reputable source. For future seasons, save seeds properly.
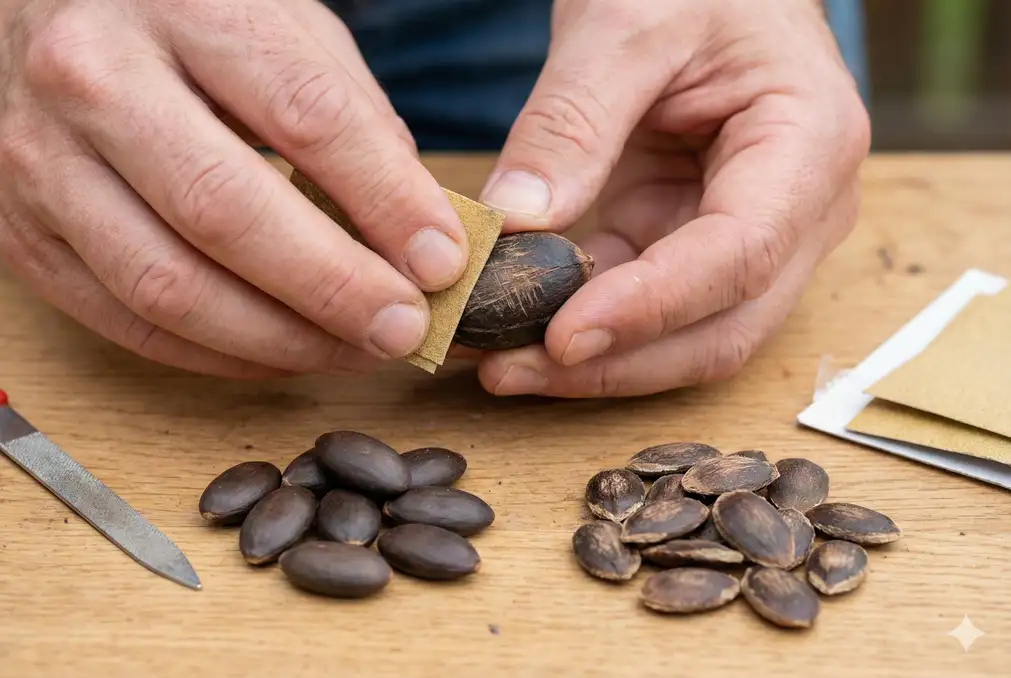
3. Hard Seed Coat Not Pre-Treated
Loofah seeds have a hard outer coat that can prevent water from penetrating to the embryo inside. In nature, this coat breaks down over time or through animal digestion. Without pre-treatment, water can't reach the seed to trigger germination.
How to know this is your issue: Seeds planted dry without soaking, seeds still look the same size after planting (no swelling), or seeds feel as hard as when you planted them.
Soak seeds for 24-48 hours before planting. Use warm (not hot) water, around 80-90°F. Change water every 12 hours. After soaking, seeds should appear slightly swollen. For stubborn seeds, try scarification: gently nick the seed coat with a nail file on the rounded end (opposite the point), then soak 12-24 hours.
When scarifying, only break through the outer shell—don't file deeply. Damaging the inner seed kills it. A light scuff is all you need. If you see white inside, you've gone too deep.
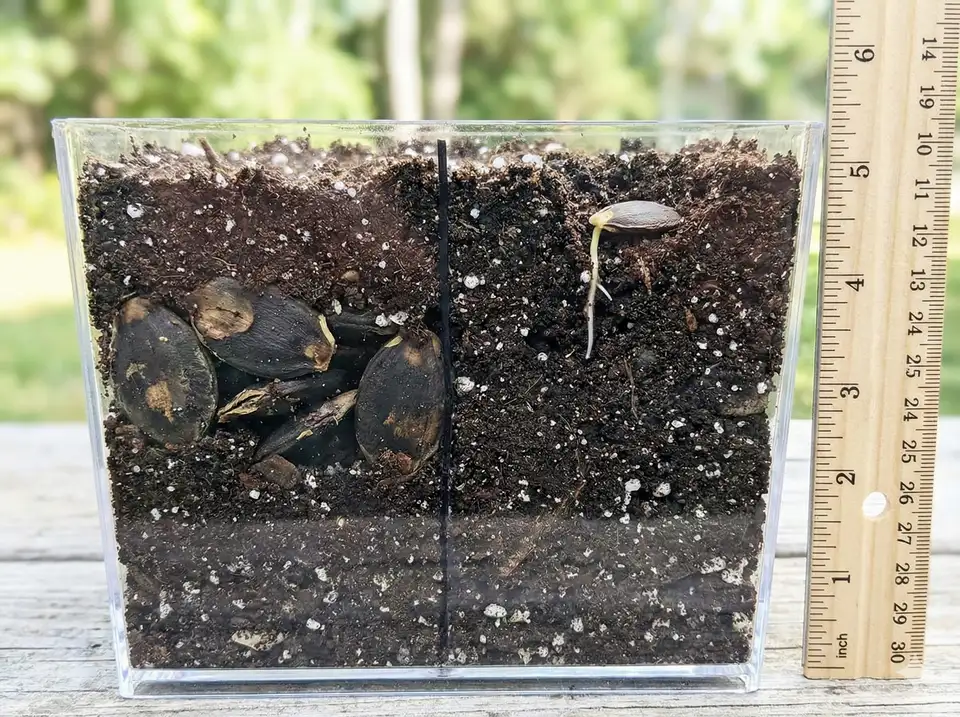
4. Planted Too Deep (or Too Shallow)
Seeds planted too deep exhaust their energy reserves before reaching the surface. Seeds too shallow dry out or get eaten by birds. The ideal depth is exactly 1 inch—deep enough for moisture retention, shallow enough for successful emergence.
How to know this is your issue: You didn't measure planting depth, seeds were just pushed into soil randomly, or you're planting in heavy clay soil (depths are relative to soil weight).
Plant seeds exactly 1 inch deep. Use a ruler or your finger to measure. Plant pointed end down (that's where the root emerges). In heavy soil, plant slightly shallower (3/4 inch); in sandy soil, plant slightly deeper (1.25 inches). Cover gently and firm soil lightly.
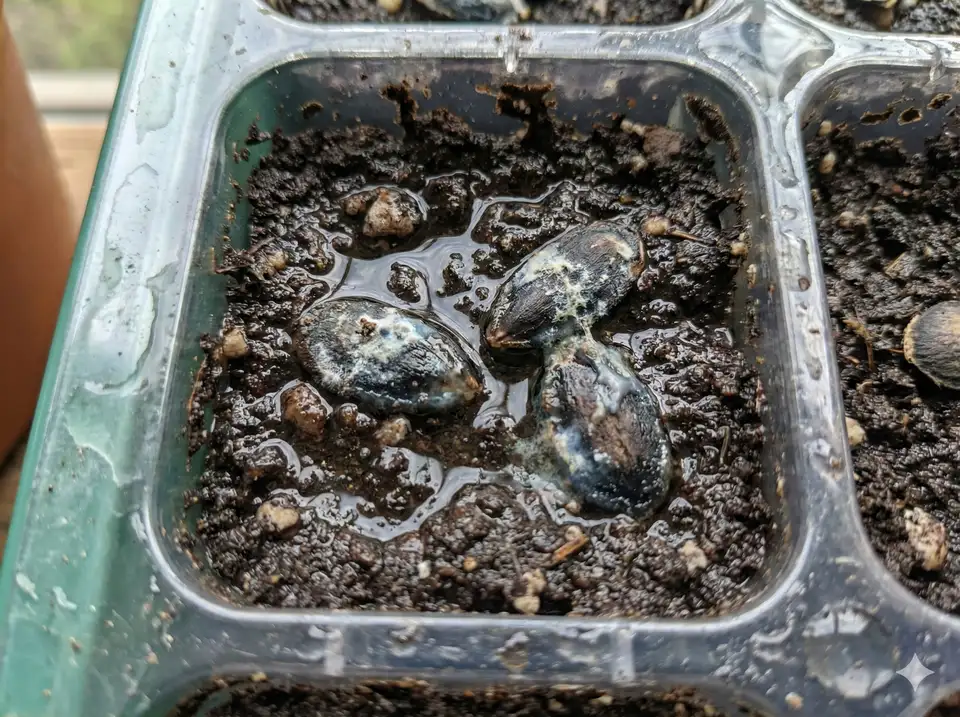
5. Overwatering (Root Rot)
Seeds need moisture but not saturation. Waterlogged soil cuts off oxygen, creating conditions where seeds rot instead of germinate. Well-meaning gardeners often keep soil too wet, especially when seeds seem slow to sprout.
How to know this is your issue: Soil feels soggy, water pools on surface, soil smells sour or rotten, pots sitting in water-filled trays, or you water daily "just in case."
Keep soil moist, not wet. The squeeze test: grab a handful of soil and squeeze. It should hold together but not drip water. If water drips, it's too wet. Water only when the top 1/2 inch feels dry. Use containers with drainage holes. Empty saucers after watering.
6. Poor Quality Growing Medium
Heavy garden soil, old potting mix, or contaminated medium can prevent germination. Garden soil compacts, reducing oxygen. Old potting mix may harbor disease. Some "seed starting mixes" contain fertilizers that burn tender seeds.
How to know this is your issue: Using soil dug from garden, potting mix left over from previous years, mix that crusts on top or repels water, or very cheap generic potting soil.
Use fresh, sterile seed starting mix. Quality mixes are light, fluffy, and well-draining. They typically contain peat, vermiculite, and perlite with no added fertilizer. Pre-moisten mix before filling pots. Replace any old or questionable growing medium.
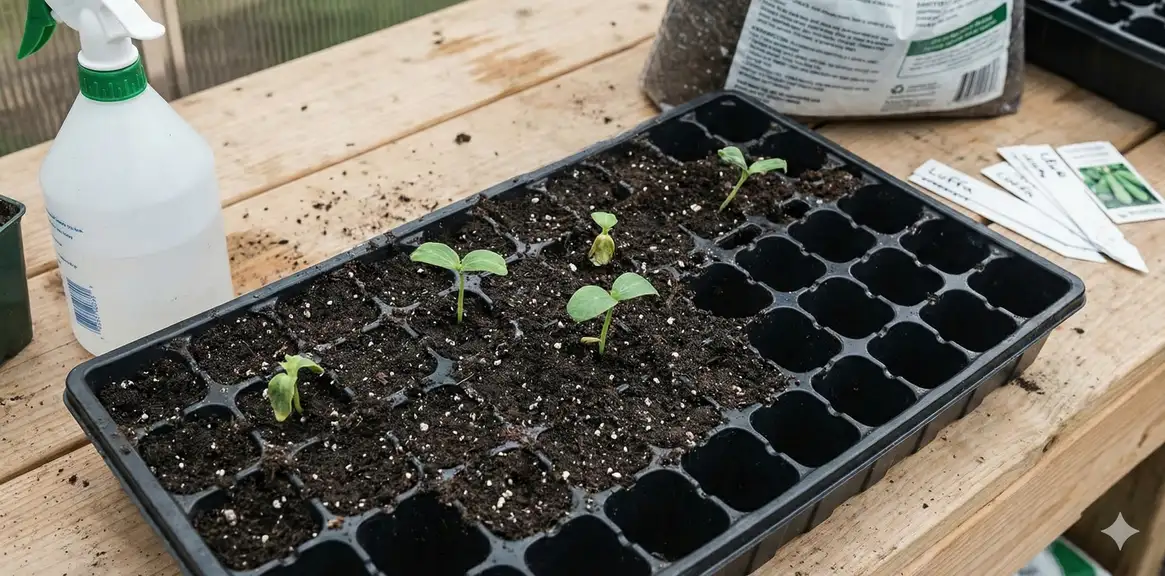
7. Giving Up Too Soon
Loofah germination takes longer than many common garden seeds. While tomatoes might sprout in 5-7 days, loofah commonly takes 14-21 days—sometimes longer. Gardeners expecting quick results give up and discard viable seeds.
How to know this is your issue: It's been less than 3 weeks, you're comparing to faster-germinating seeds, or you've already thrown out "failed" seeds after 10-14 days.
Wait at least 21 days before declaring failure. Mark your calendar. As long as seeds haven't rotted (soft, smelly, or moldy), they may still sprout. Keep soil warm and consistently moist. Check daily but resist the urge to dig up seeds to "check on them"—this damages emerging roots.
Rescue Mission: What to Do Now
If your seeds have been in soil for over a week with no signs of life, here's your action plan:
Step 1: Diagnose the Problem
Check soil temperature, moisture level, and seed depth. Look for signs of rot (smell the soil). Consider seed source and age. Most germination failures come down to one or two issues.
Step 2: Fix the Conditions
- Add heat mat if soil is below 70°F
- Adjust watering if soil is too wet or dry
- Improve drainage if needed
- Move to brighter location (indirect light)
Step 3: Start Fresh If Needed
If it's been 3+ weeks with optimal conditions and no germination, your seeds are likely dead. Start over with fresh, quality seeds, following proper seed starting techniques from the beginning. Make sure you time your planting correctly based on your growing zone's frost dates.
Always start more loofah seeds than you need. Even with perfect technique, some seeds won't germinate. Starting 50% extra ensures you'll have enough healthy seedlings to plant.
Preventing Future Germination Problems
Follow this checklist every time you start loofah seeds:
- Fresh seeds – Buy from reputable suppliers with current-year dates or save seeds properly
- Pre-soak – 24-48 hours in warm water before planting
- Warm soil – 75-85°F using a heat mat
- Proper depth – Exactly 1 inch, pointed end down
- Moist not wet – Soil holds together but doesn't drip
- Good drainage – Pots with holes, empty saucers
- Fresh medium – Sterile seed starting mix
- Patience – Wait 21+ days before giving up
With these fundamentals in place, you'll see germination rates of 80-95%. Loofah isn't difficult to germinate—it just requires the right conditions.
What's Next After Germination?
Once your seeds sprout, the real growing begins! Continue caring for seedlings indoors until they're ready to transplant outdoors. Whether you're growing in the ground or trying container growing, make sure to prepare your trellis system before planting out.
Don't let germination troubles discourage you. Most loofah growers face this hurdle at some point. With the right conditions and a little patience, you'll have healthy seedlings ready to grow into productive vines. For a comprehensive overview of the entire process from seed to sponge, refer to our complete growing guide.